
Navisys GR-9029 offers centimeter-level accuracy for stakeouts, combining ease of use with affordability. Move away from bulky survey RTK GNSS equipment; the GR-9029 is a compact, portable device equipped with RTK capabilities. It features a built-in rechargeable battery and can easily pair with your phone using the accompanying BLERTK app. Stakeouts have never been so straightforward and convenient.
Here is a step-by-step guide on how to use the Navisys GR-9029 for stakeouts.
Connect the GR-9029 to your iPhone or Android phone.
For detailed instructions, please refer to the documentation provided below.
- If you are using an IOS device, please click here.
- If you are using an Android device, please click here.
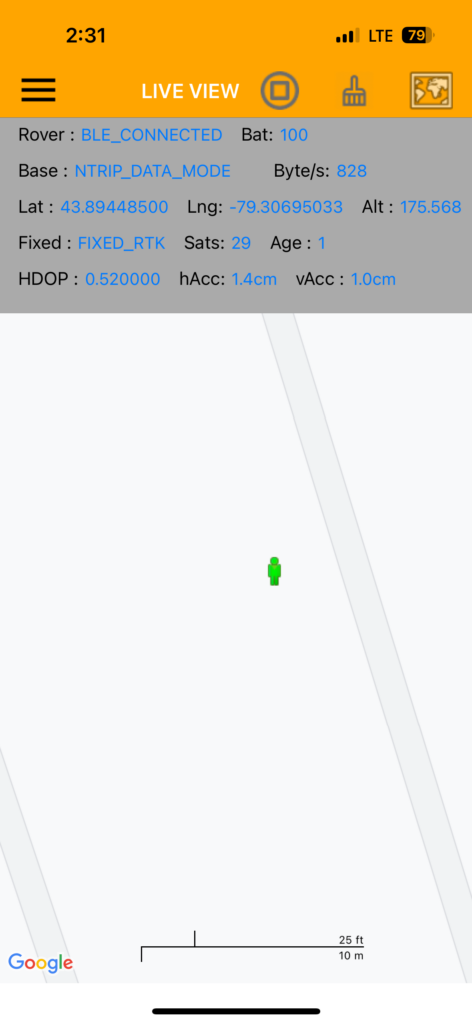
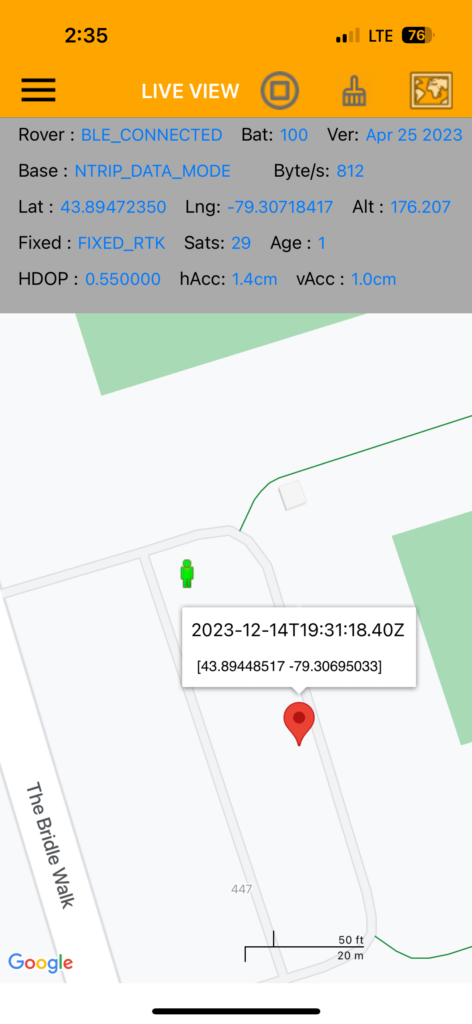
After setup, you should be able to achieve a ‘Fixed_RTK’ status as shown in the screenshot below.
Prepare a Waypoint file in KML format.
To perform a stakeout using the BLERTK app and the GR-9029 RTK GNSS, you need to prepare your waypoint file in KML format.
Option 1:
If you collected the waypoints with a GR-9029(Please refer to this here.), you can easily convert the PIN file to a KML format using the app’s built-in feature. Here’s how:
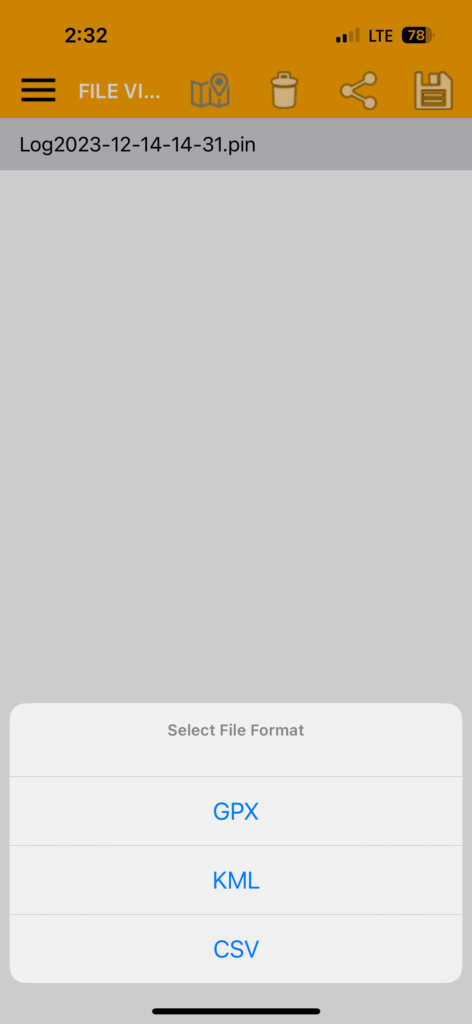
Open the BLERTK app and tap the hamburger menu icon on the main screen. Select “Log View” from the menu. Choose the PIN file you wish to convert. Tap the “Disk” icon and select a file format. You’ll see options for GPX, KML, and CSV. Choose KML.
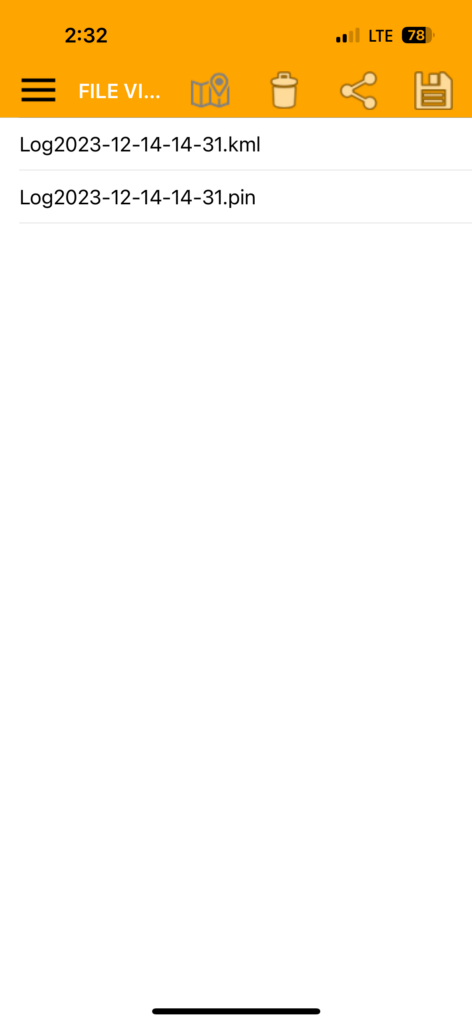
A new KML file, once converted, will be located in the same folder as the existing PIN file.
Option 2:
If you have the coordinates, you can use a tool to create a KML file. For instance:
- Google Earth: Enter the coordinates directly into Google Earth, create Placemarks, and then save them as a KML file.
- ArcGIS / QGIS: Import your coordinate data into these programs and then export it in KML format.
Option 3:
Using an existing KML file and a text editor, such as VS Code, Atom, or Notepad++, you can directly modify the coordinates within the coordinates tag.

Load the KML file into the BLERTK app and enable the StakeOut feature.
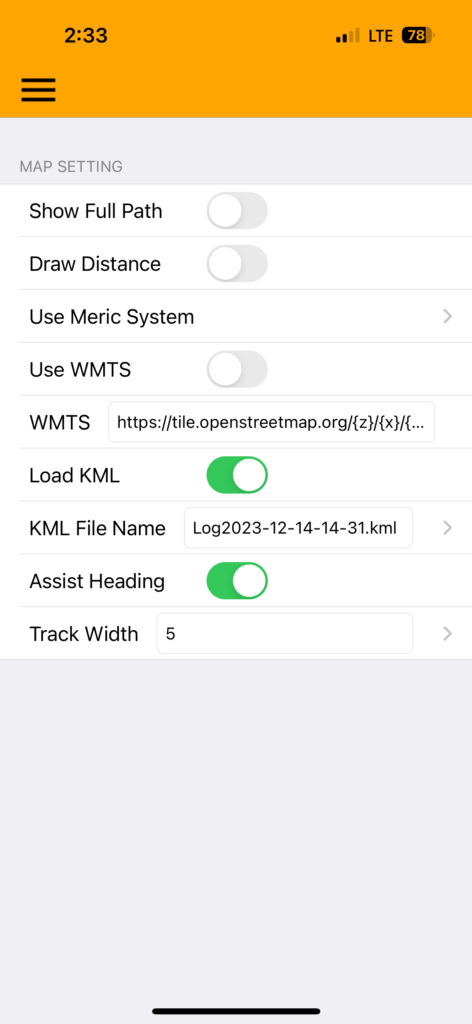
To load the KML file, open the BLERTK app, tap the hamburger icon(the main menu), and select “Map Setting” Enable the “Load KML” and “Assist Heading” options. Then select the KML file containing the waypoints you wish to stake out.
Tap the hamburger icon again, and select “Map View” menu. Your current location will be displayed as a human icon, and the stakeout point will appear as a red drop pin on the screen. Ensure you tap the red drop pin, which will then display its data tag above it. (Without the display of this data tag, the “Enable StakeOut” option will not appear in the subsequent step.)
Tap on the “Map” icon. In the “Select Map Type” menu, choose the “Enable Stake Out” option.

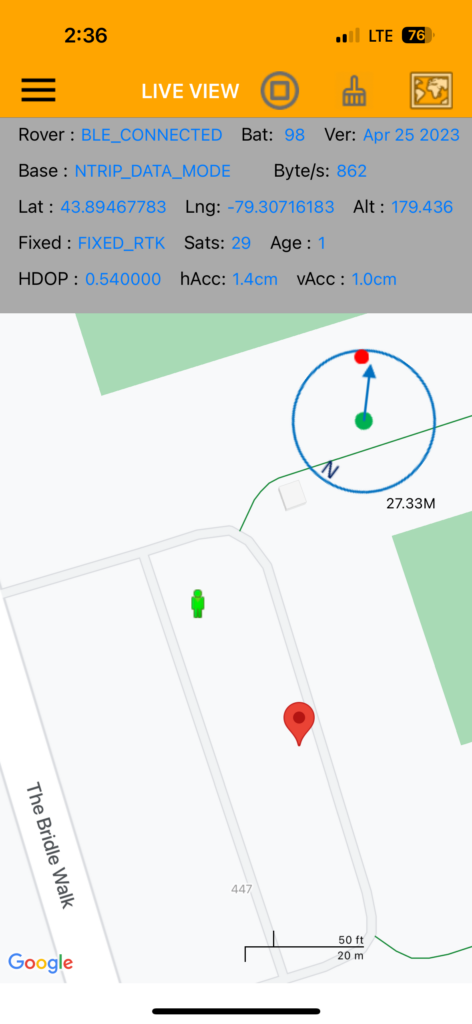
Now, the stakeout circle, along with the direction pointer and distance reading, will be displayed on the screen.
Locating the StakeOut point
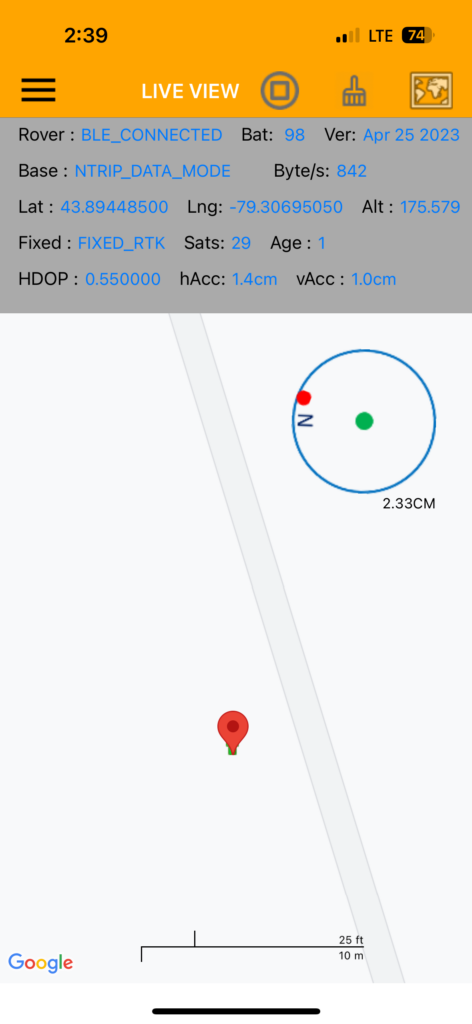
You can follow the pointer’s direction and the distance reading to approach the StakeOut point. Continue until the distance reaches within 1-3 cm, at which point you can mark this location.
Navisys RTK GNSS can be purchased from:
https://gpswebshop.com (US & WorldWide)
https://canadagps.ca (Canada)