
The accuracy of the base station position is crucial because any errors in its location will directly impact the accuracy of the rover’s position. To achieve a highly precise base station location, one popular method is using PPP (Precise Point Positioning).
In this document, we specifically refer to the TOP168 RTK base station. However, if you have another u-blox ZED-F9P GNSS receiver, you can also use this document as a reference.
1. Download and install the configuration tool
If you already have the “u-center” software installed, please proceed directly to section 2. If not, you will need to download it from the u-blox website at https://www.u-blox.com/en/product/u-center.
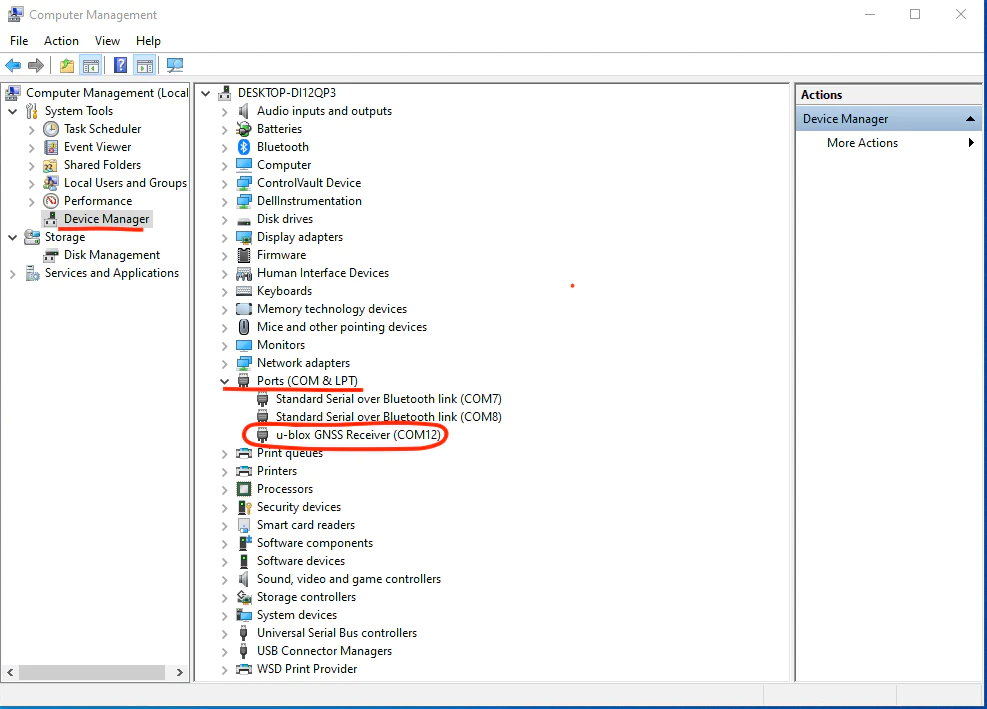
For TOP168 or another ZED-F9P GNSS receiver, please select the edition that is compatible with “F9/M9”. Once downloaded, install the u-center software on your Windows computer. Next, connect the TOP168 GNSS receiver to a USB port. Open the “Device Manager” and expand the section labeled “Ports (COM & LPT)”. Look for either “u-blox GNSS Receiver (COMxx)” or “USB Serial Device (COMxx)”. In the provided example, the COMxx value is COM12. Make a note of this COM port number. To establish a connection between u-center and the TOP168, you will need to connect to this specific COM port.
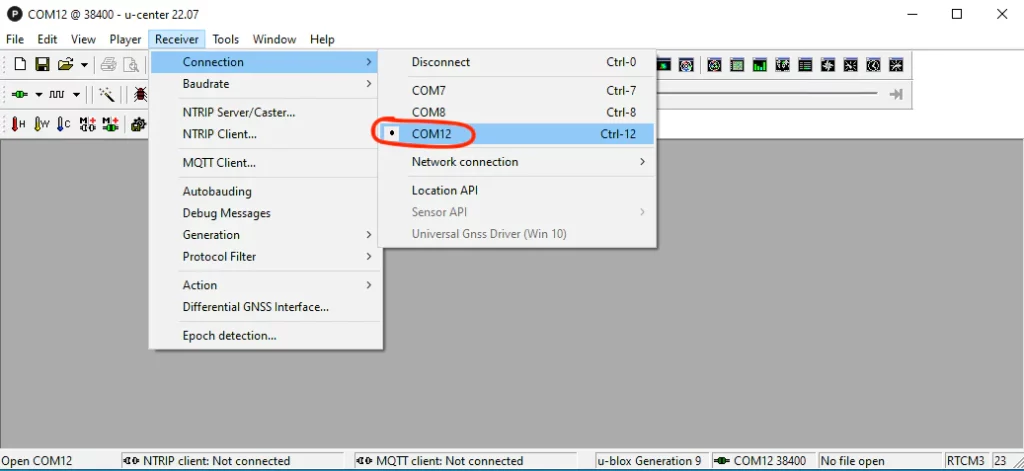
Open the u-center software. From the menu, navigate to “Receiver” and then select “Connection”. Choose the COM port you previously noted down from the Device Manager, which in this case is COM12.
2. Configure the GNSS receiver output “raw” data.
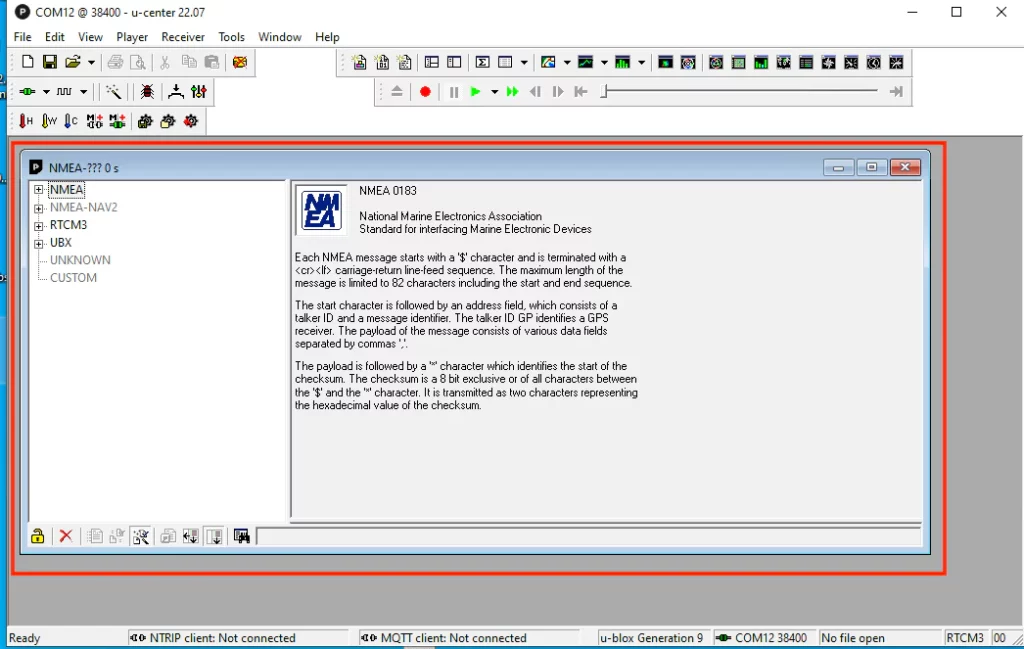
In the u-center menu, go to “View” and then select “Message view”. This will open the message view window.
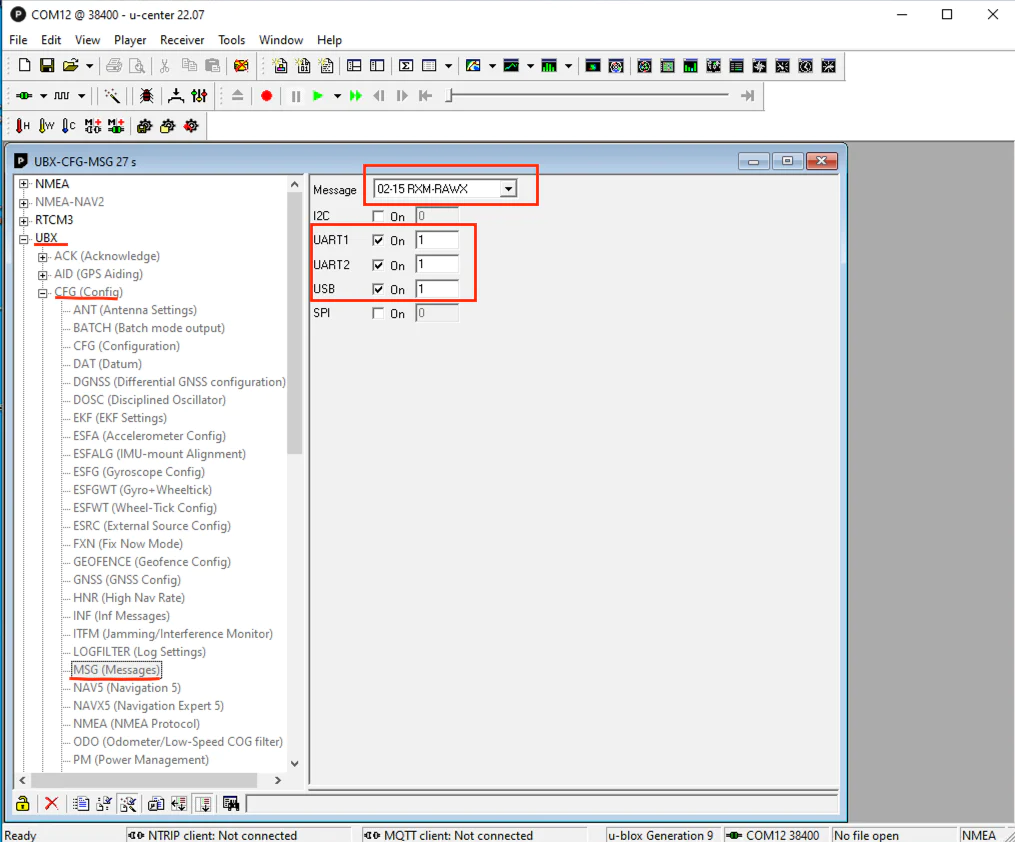
In the “Message view” window, locate and select “UBX→CFG→MSG”. On the right panel, find the message labeled “02-15 RXM-RAWX”. Enable UATR1, UATR2, and USB for this message.
To save the settings, click the “send” button twice. Please note that in u-center, pressing the “send” button twice is necessary to save the settings on the current screen.
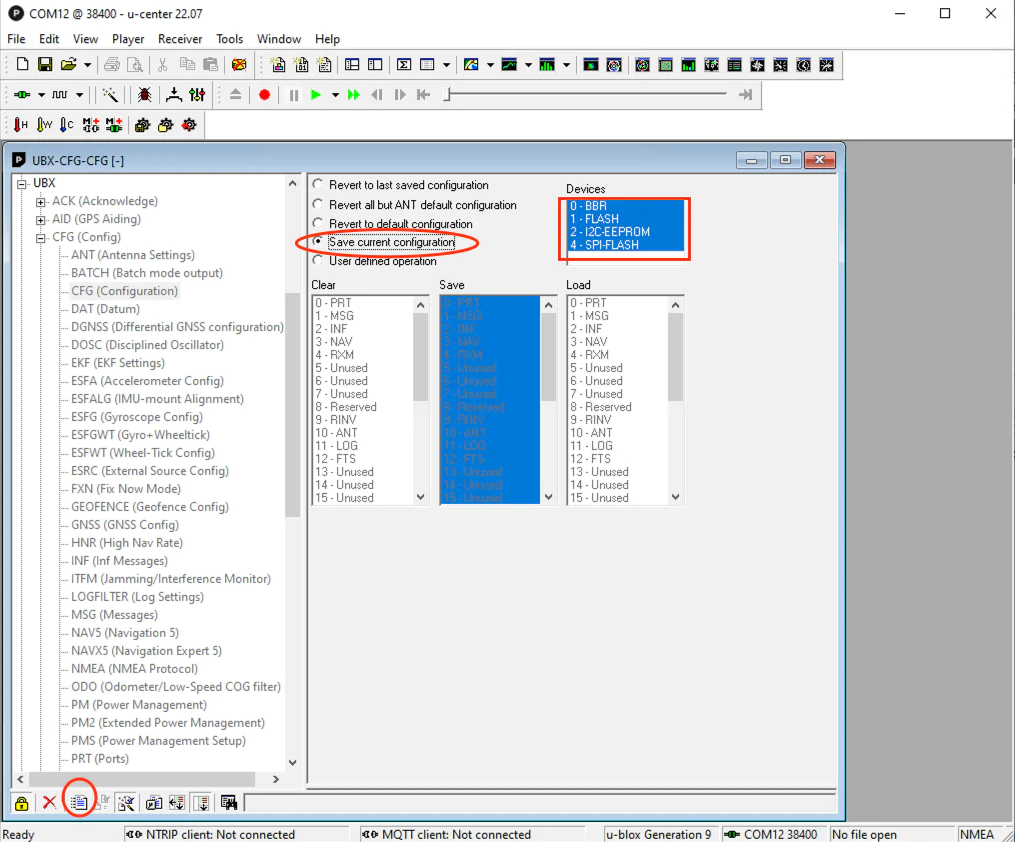
In the u-center software, go to the Message view window. Select “UBX→CFG→CFG” from the options.
In the right panel, choose “Save current configuration” and make sure to highlight all the “Devices”. Then, press the “send” button twice to save the configuration.
At this point, your GNSS receiver has been configured to output raw data through the USB interface.
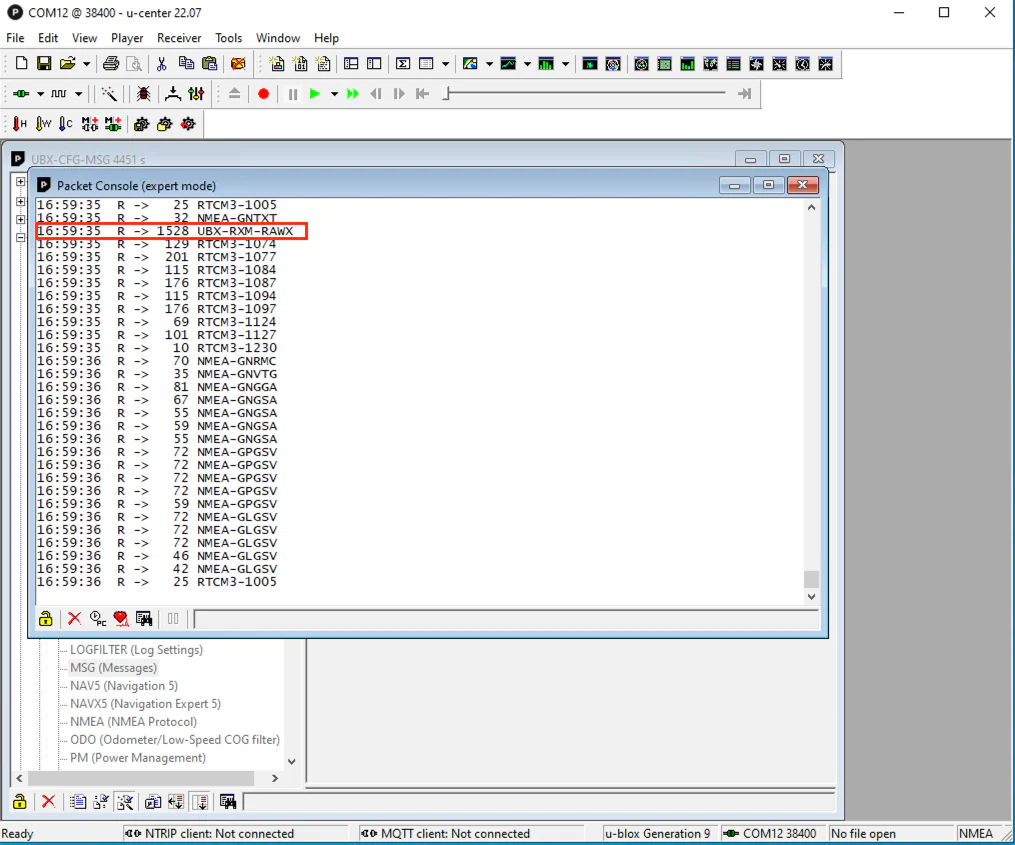
To verify this configuration, open the “Packet Console” in u-center. You should be able to observe the “UBX-RTX-RAWX” message being displayed.
3. Record the Base Station location data into a .UBX file.
Click the record button.
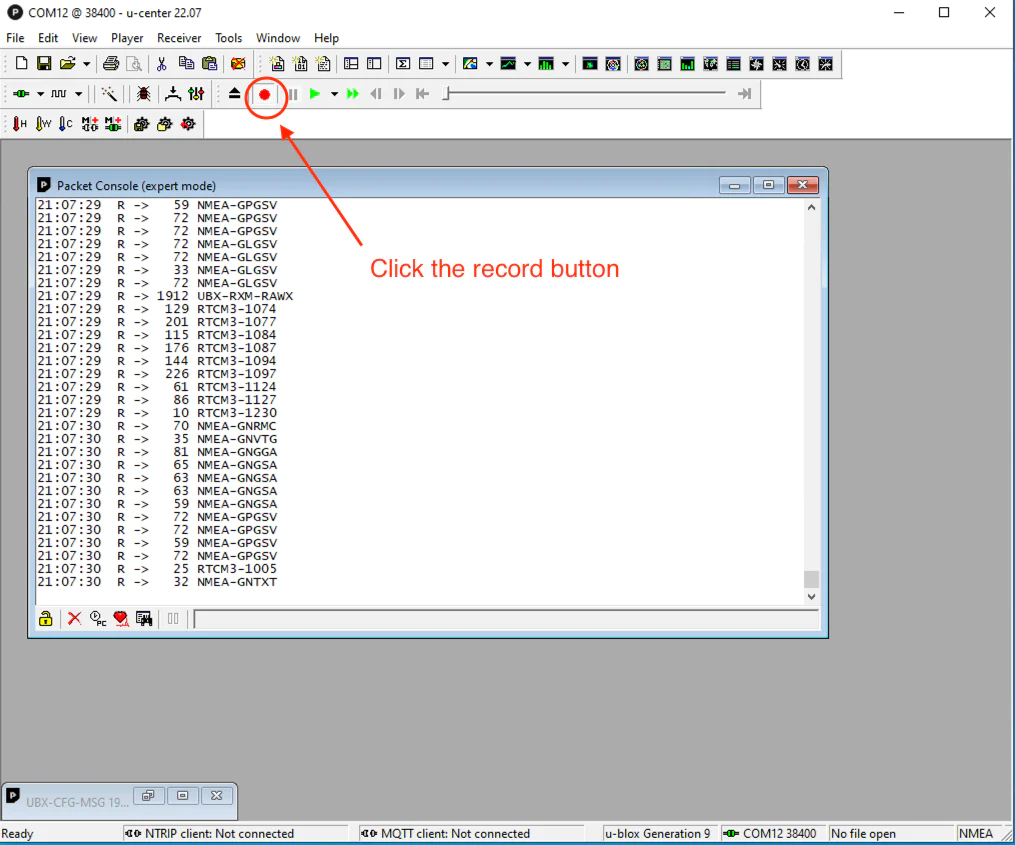
When prompted, enter the desired file name to save the recording data. When asked to select the generation, choose “u-blox generation 9”.
Recording for a duration of 6 hours is generally sufficient, but recording for longer periods can provide slightly better results. However, it can be challenging to discern significant differences. Avoid recording for more than 24 hours, as it may require trimming the data later. Most online PPK services only accept data that is 24 hours or less.
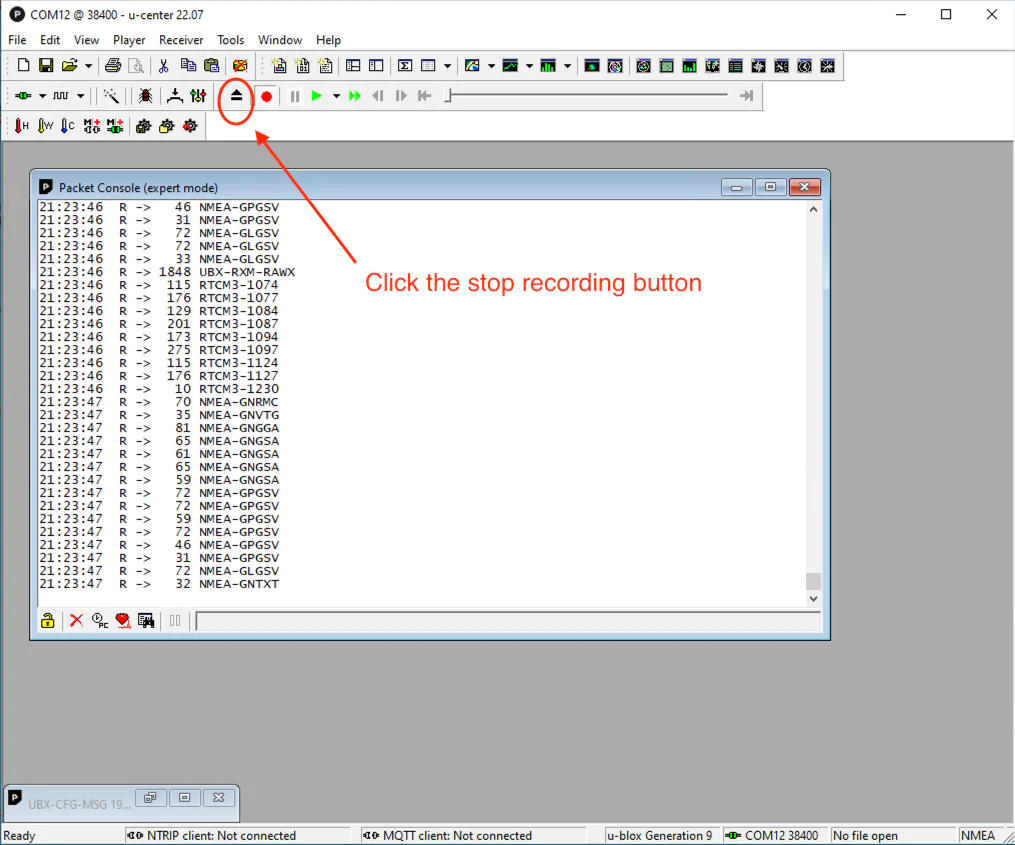
Click the “stop” button when you decide to finish the recording.
(If you plan to use the same GNSS receiver as an RTK base station, please disable raw data output once the data collection is complete. Raw data output can potentially impact the stability of RTCM 1005.)
4. Convert the RAWX (.ubx) data to RINEX(.obs) format
Before sending the collected data (in .ubx file format) to a PPK service for processing, it needs to be converted to RINEX format (.obs file extension). One popular and free tool for performing this conversion is RTKLIB. You can download RTKLIB from the following website: http://rtkexplorer.com/downloads/rtklib-code/
Once downloaded, unzip the file. Inside, you will find a program named Rtkconv.exe. This program is used for the conversion process.
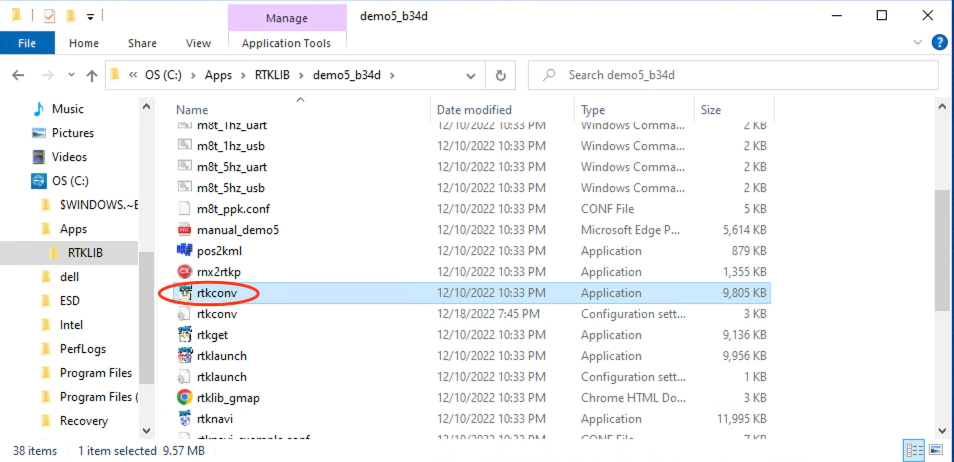
Double-click the Rtkconv.exe. You will see the window below.
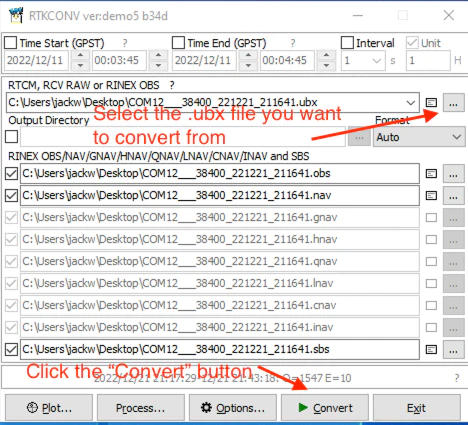
Choose the recently recorded .ubx file and click the “Convert” button. After a short while, the .obs file will be generated.
Next, compress your .obs file by zipping it into a .zip file.
5. Submit the location data to an online PPP(Precise Point Positioning) service
Now it’s time to upload the .obs data file to an online PPP service for processing. If you perform a Google search for “Free Online Post-Processing Services,” you will find several available options. Many of these services are similar, so you can choose the one that suits your preferences.
One service that I have tried is the Canadian CSRS-PPP service. It is free, user-friendly, and offers worldwide coverage. You can access it at the following URL:
https://webapp.csrs-scrs.nrcan-rncan.gc.ca/geod/tools-outils/ppp.php?locale=en
For first-time users, you can begin by clicking on “Sign in” and then selecting “New User: Create an account” on the CSRS-PPP website. The system will send you an email with further instructions. Make sure to click on the “active your account link” in the email to complete the account activation process.
Once your account is activated, you can log in to CSRS-PPP using the URL provided earlier.
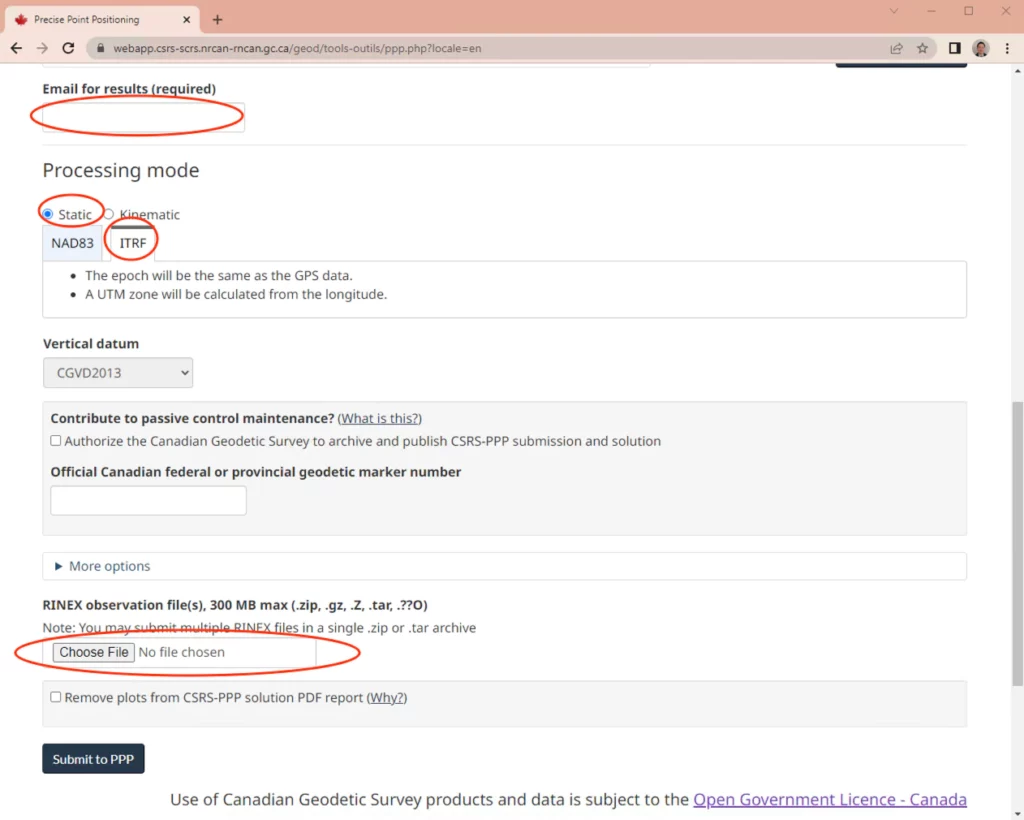
To process your data, input the email address where you want to receive the results. Select “static” as the processing mode and “ITRF” as the reference frame. Then, choose the zip file you created earlier (the zipped .obs file). Finally, click on the “Submit to PPP” button to initiate the processing.
Usually, you will receive an email containing the processed results within a few hours. The email will resemble the following format:
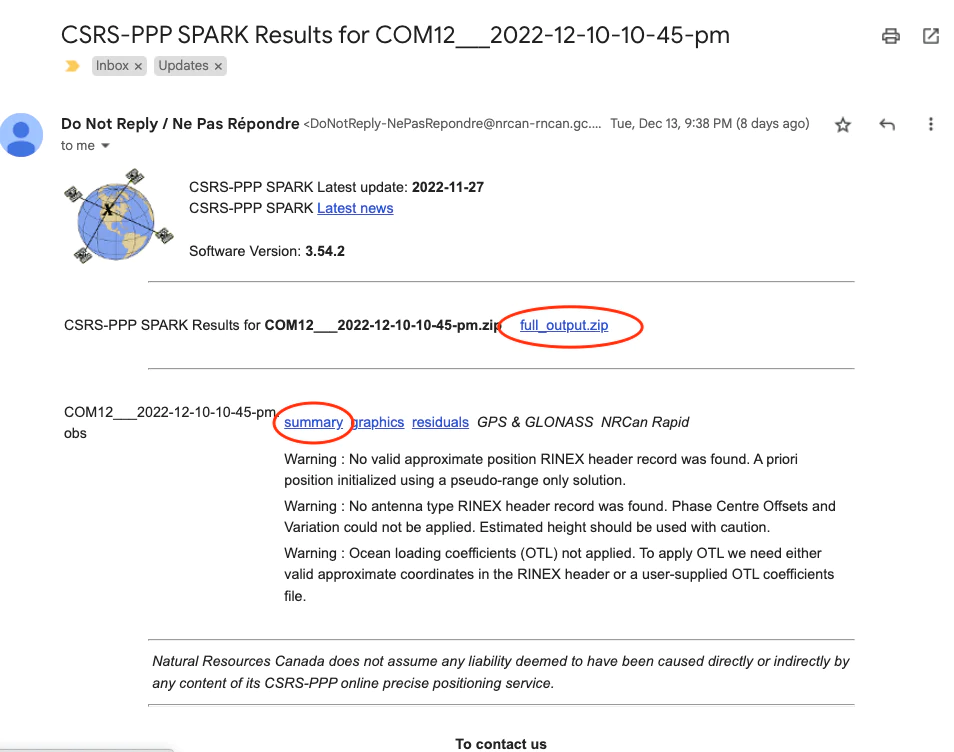
In the email, click on the ‘Summary’ link to access a detailed summary of the results. This summary will provide you with the coordinates of your antenna in Geodetic, UTM, and Cartesian formats. These coordinates are highly accurate, typically with a precision level of up to centimeters. You can confidently use these coordinates for your base station.
We have a detailed blog post on ‘RTK/PPK Base Station Accuracy: Long-Duration Survey-In vs. PPP (Precise Point Positioning)’ that you might find interesting. Be sure to check it out!
We have tested the below RTK GPS/GNSS receivers
work with this instruction.
They can be purchased from:
https://gpswebshop.com (US & WorldWide)
https://canadagps.ca (Canada)