
1. If you didn’t do so, please download the Windows USB driver of P-7 Pro from here. Install the driver.
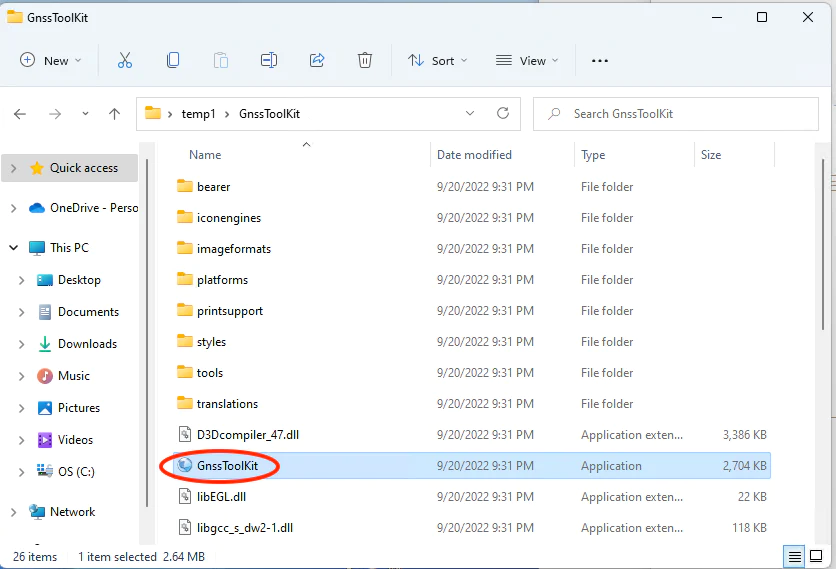
2. Download GnssToolKit3 software from here , extract it and double click the GnssToolkit.exe.
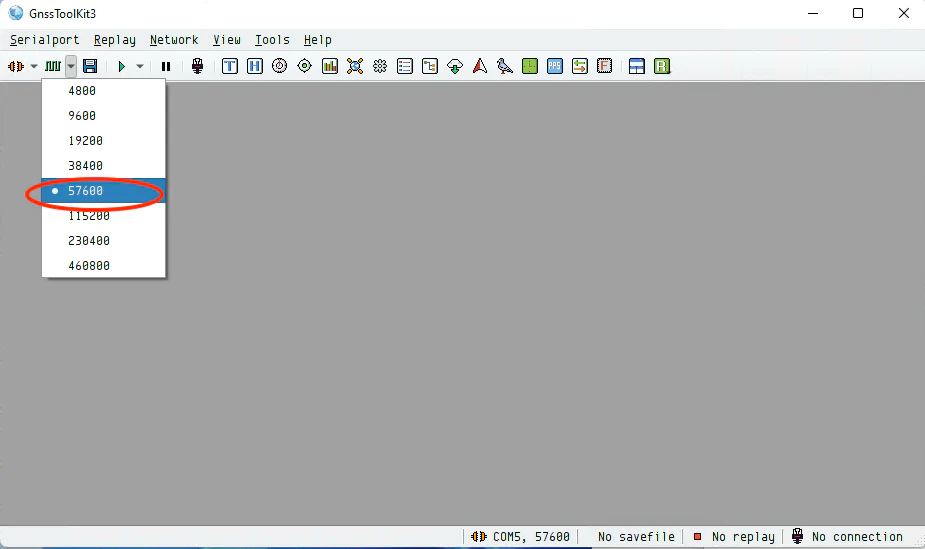
3. Select the baud rate 57600.
4. Plug in the P-7 Pro to the computer’s USB port.
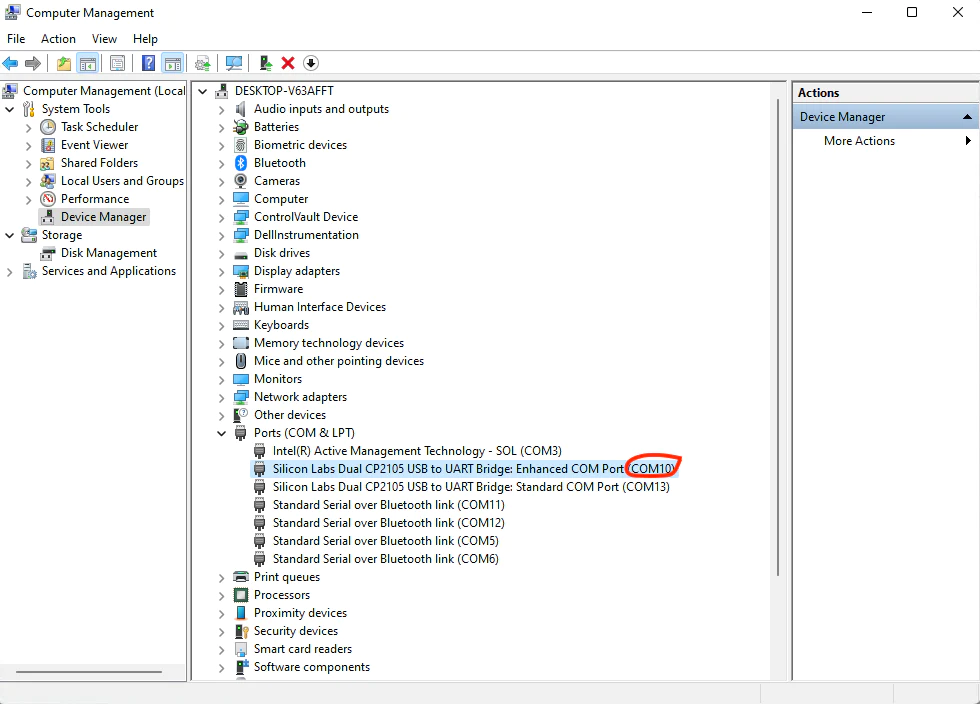
5. Open the “Device Manager” from the Windows. Select Ports (COM & LPT). Note down one of the com ports number which showing “Silicon Labs Dual CP2105 USB to UART Bridge: Enhanced COM Port”. I will use “COM10” in this instruction.
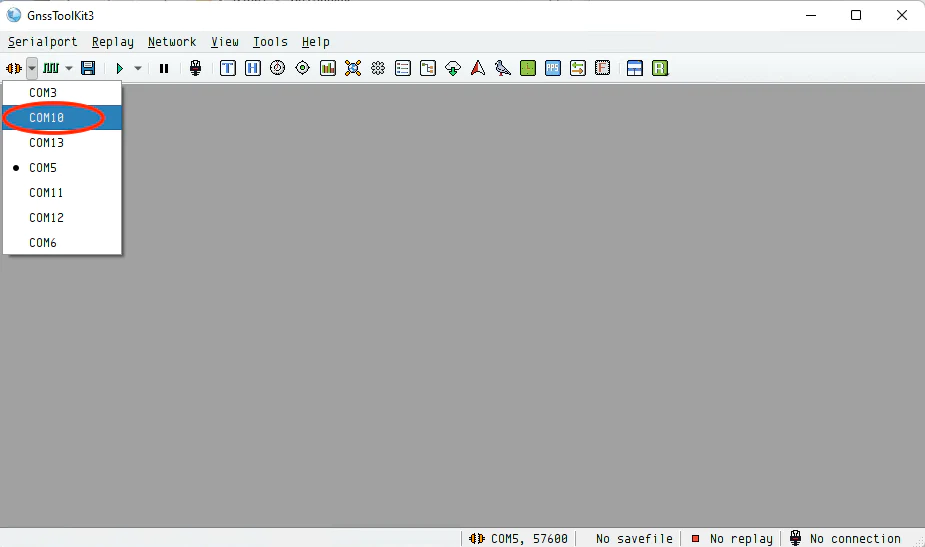
6. Connect the COM Port (COM10 here) from the GnssToolKit3.
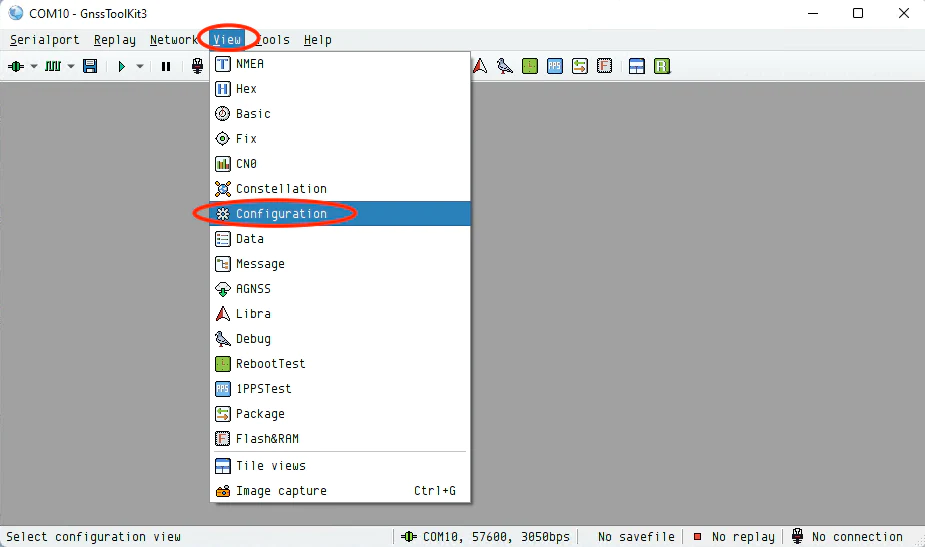
7. Select View –> Configuration from the menu.
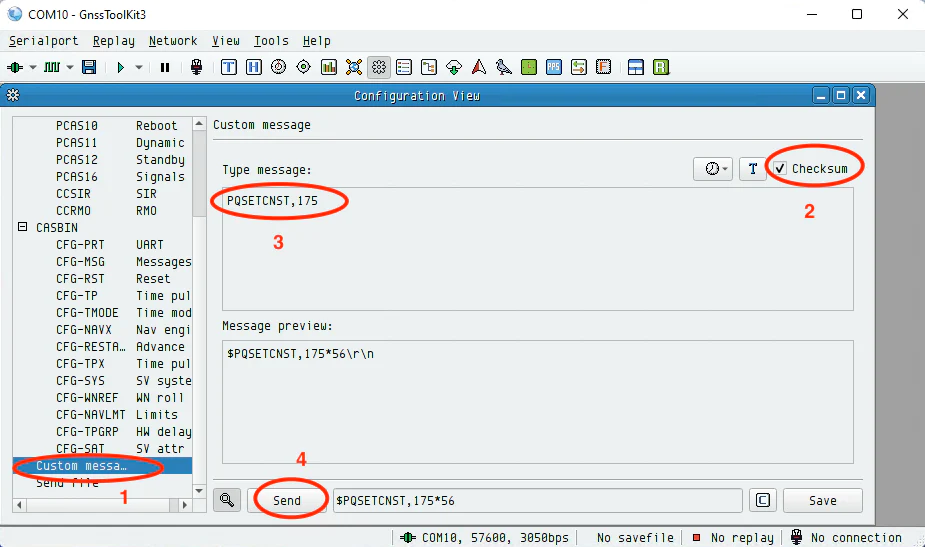
8. Click the “Custom message”, check the Checksum, paste “PQSETCNST,175” in the “type message” field and press the “Send” button.
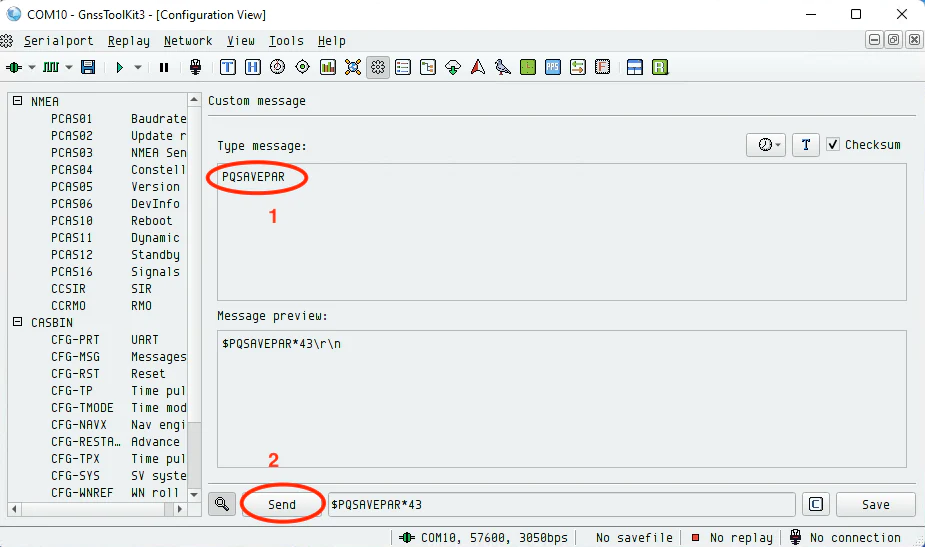
9. Paste “PQSAVEPAR” in the “type message” field and replace the previous value. Press the “Send” button. Unplug and plug back the P-7 Pro (power cycle). That’s all needed to enable the SABS for P-7 Pro.
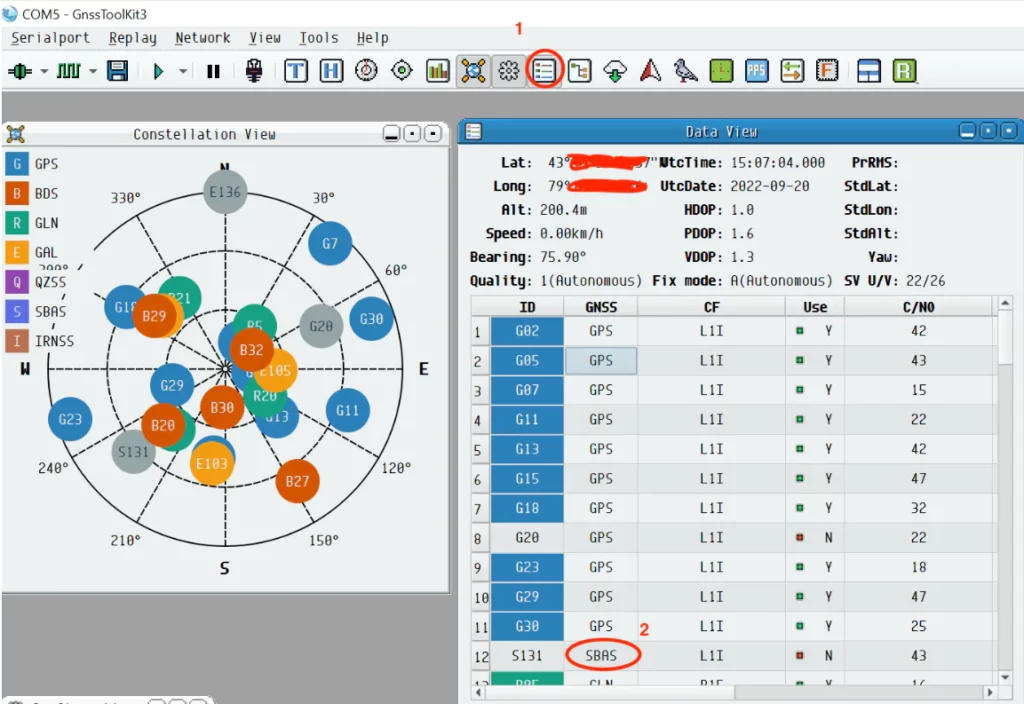
10. To verify if the P-7 Pro can really receive SBAS satellites. Select the “Data View”. Expose the P-7 Pro under the open sky for a while. You will see 1 or more SBAS satellites in Data View.
Columbus P-7 Pro can be purchased from:
https://gpswebshop.com (US & WorldWide)
https://canadagps.ca (Canada)