If real-time internet or radio connections between the rover and base station are limited or unavailable, or if immediate positioning results are not required, you can utilize the PPK (Post-Processed Kinematic) method for high-accuracy positioning. PPK allows you to collect GNSS data in the field and apply corrections after the data collection process is complete by using a PPK offline software, this method typically achieves centimeter-level accuracy.
In this article, we demonstrate how to use the Columbus EX-1 RTK/PPK GNSS Data Logger for PPK data collection and Emlid Studio software for data processing.
Requirements:
- 2 x Columbus EX-1 RTK/PPK GNSS Data Logger (These 2 devices are available for purchase from GPSWebShop).
- Emlid Studio (This free software for Windows or macOS can be downloaded from the Emlid website.)
Preparation:
For PPK data collection, you need two EX-1 RTK/PPK GNSS Data Loggers—one configured as the PPK Base Station and the other as the PPK Rover.
Please refer to the EX-1 user manual for configuration instructions. Essentially, you need to configure the EX-1 Base unit with the following settings:
- Mode: BASE
For the EX-1 Rover unit, configure it with these settings:
- Mode: ROVER
- RawData: ON
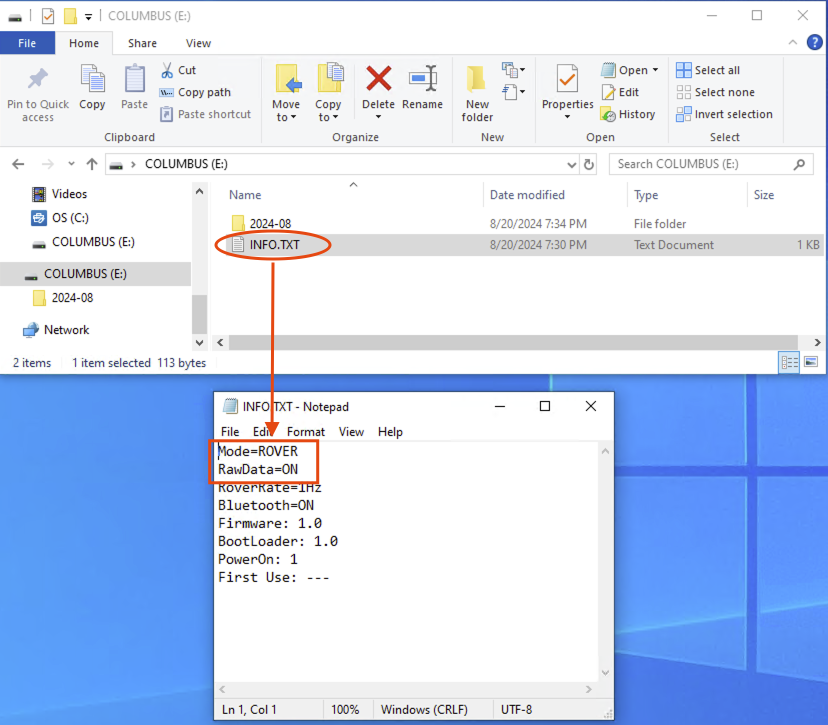
To verify that the configuration was successful, check the INFO.TXT file located in the root folder of your microSD memory card with the below setting.
For the EX-1 configured as a PPK Base:

For the EX-1 configured as a PPK Rover:
Data Recording:
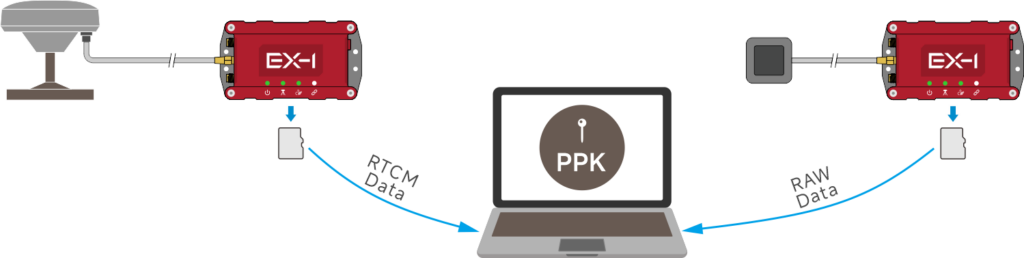
To perform PPK recording, the Base EX-1 and the Rover EX-1 need to record simultaneously.
For the Base side:
The accuracy of the base station’s position is crucial because any errors in its location will directly affect the accuracy of the rover’s position. There are two methods to configure the EX-1 base device with a highly accurate position. Please refer to the article “How to configure the Columbus EX-1 as an RTK/PPK Base Station in a Production Environment?” for detailed instructions.
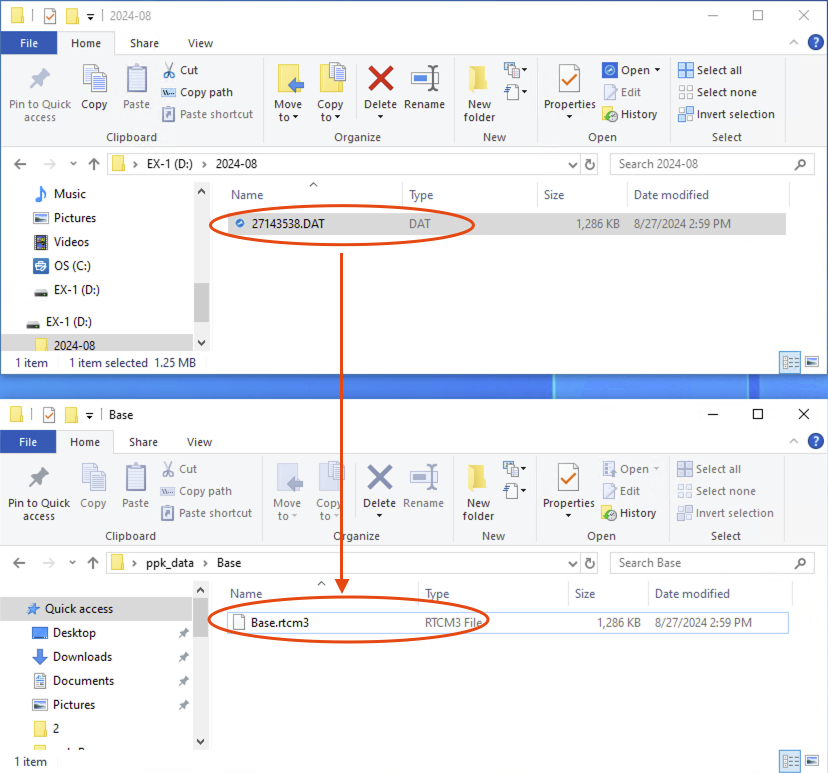
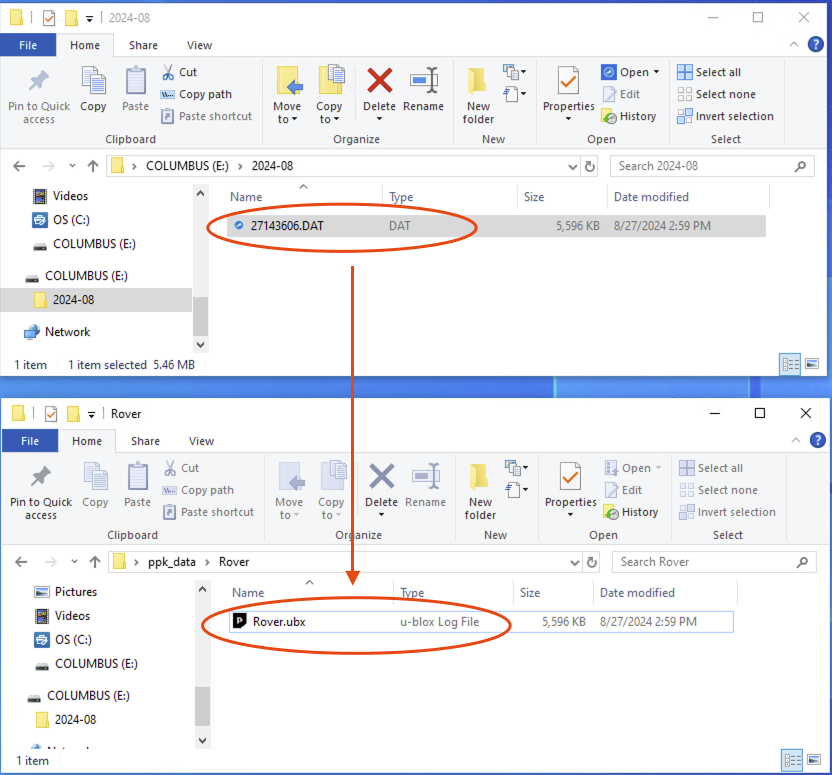
Once the base EX-1 is properly configured, simply power it on and allow it to record RTCM correction data, which will be saved to its microSD memory card. After the data collection is complete, power off the base EX-1 and connect it to a computer. You can identify the recorded data file, typically located in a folder named by the date (yyyy-mm) with a .dat extension. Copy this file to your computer running the Emlid Studio software. Rename the file to something easy to recognize and change the file extension from .dat to .rtcm3.
For the Rover side:
Power it on and allow it to record u-bloxu format of raw data, which will be saved to its microSD memory card. After the data collection is complete, power off the rover EX-1 and connect it to a computer. You can identify the recorded data file, typically located in a folder named by the date (yyyy-mm) with a .dat extension. Copy this file to your computer running the Emlid Studio software. Rename the file to something easy to recognize and change the file extension from .dat to .ubx.
(Below, you can download sample files recorded by the EX-1 Base and Rover units. You can use these files to practice PPK calculations.
)
PPK data processing using Emlid Studio:
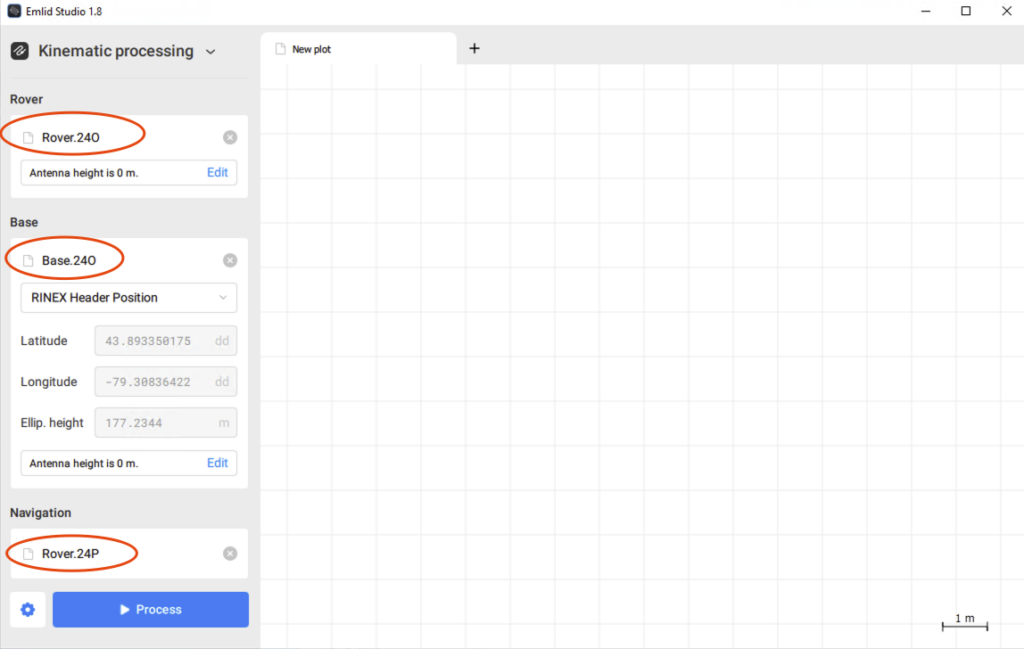
Download and install the Emlid Studio software from the Emlid website. Open Emlid Studio, and from the top-left dropdown menu, select “Kinematic: processing, Then, click the Rover and Base sections respectively and attach the .ubx and .rtcm3 data files from the previous step.

The .ubx data file attached on the Rover side is converted into:
• “Rover.24O” under the Rover section, containing observation data.
• “Rover.24P” under the Navigation section, containing navigation data.
• “Rover.sbs” is not shown in the Emlid Studio window but is located in the default conversion folder, containing SBAS correction data.
The .rtcm3 data file attached on the Base side is converted into:
• “Base.24O” under the Base section, containing RTCM correction data.
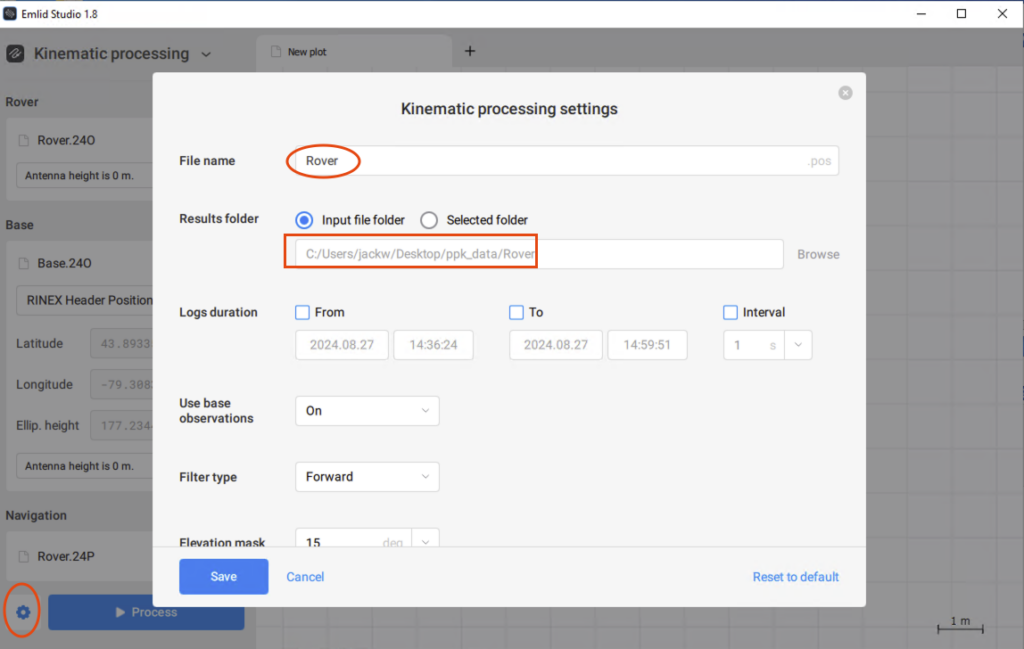
There is a gear icon in the bottom-left corner, which you can use to modify the default settings. For example, you can change the result file folder and file name. Feel free to explore the options here.
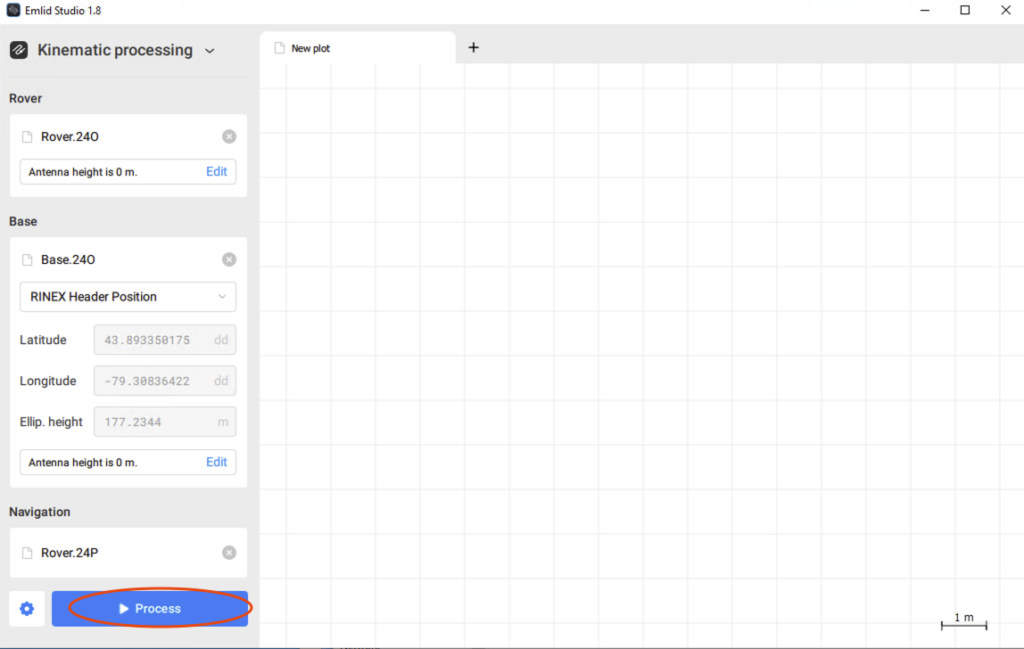
Now, please press the “Process” button to perform the PPK calculation.
When the process is complete, the resulting data will be plotted on the right side of the Emlid Studio screen.
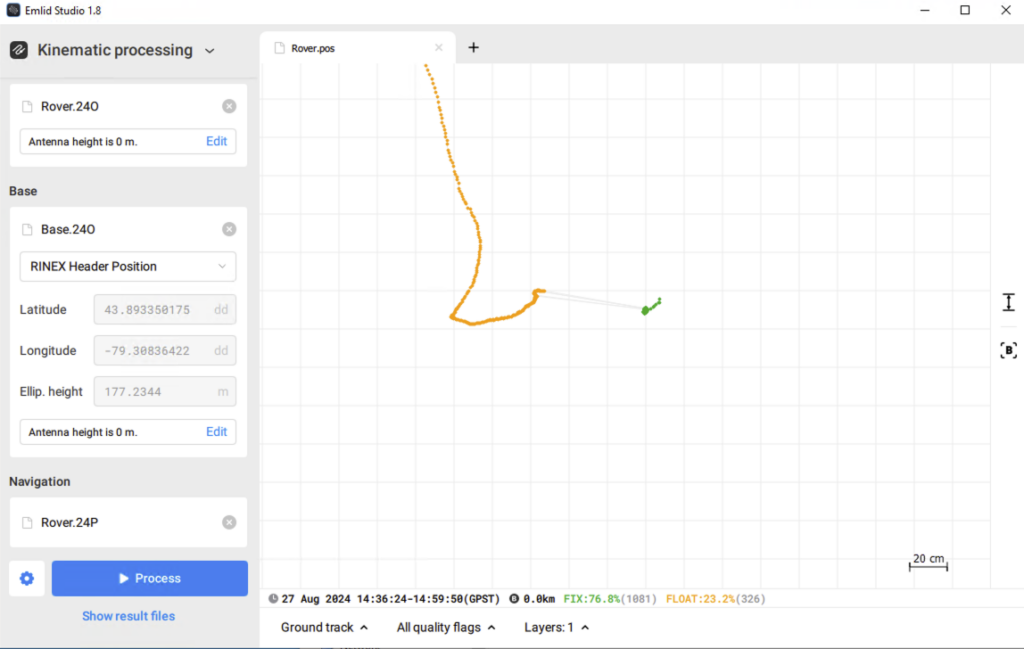
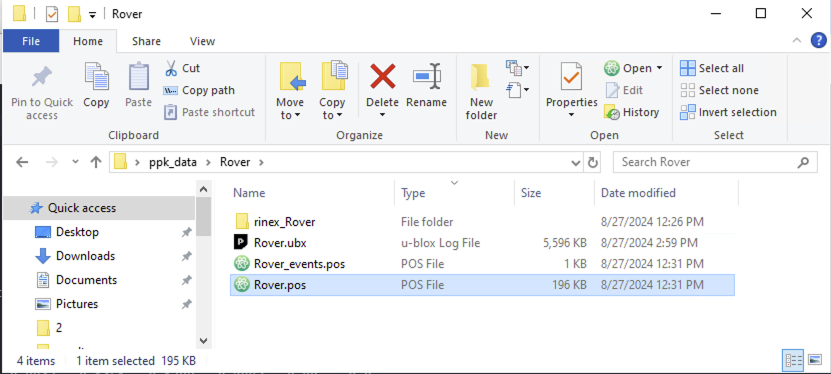
It will display the time range, the percentage of FIX positions, and the percentage of FLOAT positions. To view the result files(Rover.pos in our example), click the “Show result files” link located under the “Process” button.
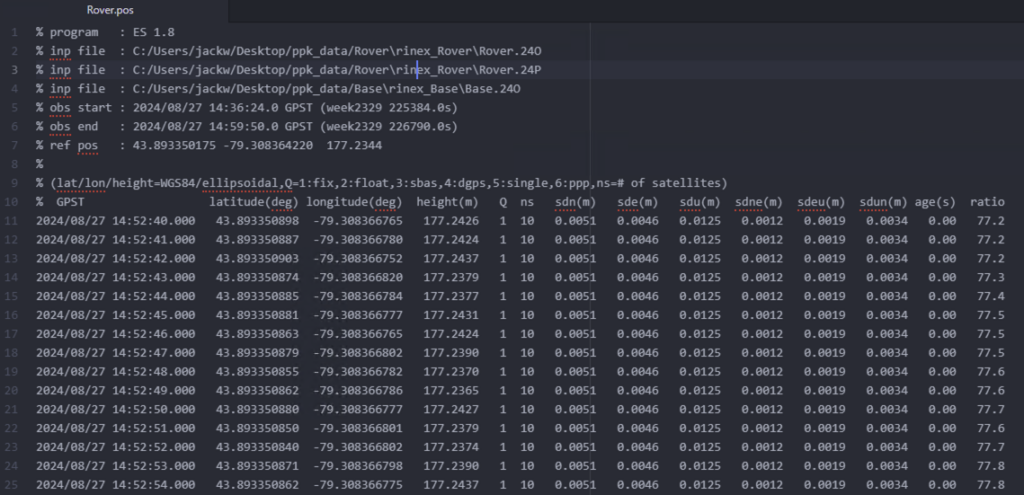
The .pos file records the trajectory data of the rover during processing, indicating the rover’s precise position at each point in time. Please see the sample pos file screenshot below.
File Format and Conversion for Results:
Although the .pos file format is not an official standard, it is widely used in the GNSS data processing field. Its simple and straightforward format makes it easy to read and process, and it is commonly used for storing and sharing processed GNSS trajectory data. Since .pos files are saved in text format, they can be easily converted to other popular geospatial data formats, such as NMEA, CSV, KML, or Shapefile.
For example:
Convert a .pos file to NMEA, CSV, KML, and Shapefile formats using RTKLib and QGIS open-source software.
- Use RTKLib’s RTKConv to convert the .pos file to NMEA format.
- Use RTKLib’s RTKPlot to convert the .pos file to CSV format.
- Use QGIS to convert the CSV file to KML format.
- Use QGIS to convert the CSV file to Shapefile format.
Columbus EX-1 can be purchased from:
https://gpswebshop.com (US & WorldWide)
https://canadagps.ca (Canada)